
The following steel layout is for up to sixty cubic meters (15,850 gallons). Use #4 bar (1/2", 1.25cm) or larger and reduce spacing with increases of tank size and height.
Place one layer of fifteen centimeter square (6"), 10 gauge welded wire on the circle. This is a standard construction grade welded wire which has almost twice the tensile strength of standard reinforcing bar. Place more pieces of welded wire until the tank floor circle is complete with the first layer. Overlap pieces of welded wire at least one square. If the welded wire is from a roll, flip it over so it can't roll back up, reinforcing steel bars will hold it down.

A grid of #3 bar is placed on top of the first layer of welded wire. A grid spacing of 30 to 45 centimeters (12 - 18") has proven sufficient for this tank size. Reinforcing bars should extend forty to sixty centimeters (15 - 24") beyond the circle on both sides. The bar can be cut with a torch, saw, or large bolt cutters. Overlap the bars at least thirty centimeters.
Trim the first layer of welded wire when the reinforcing bars are all in place and the grid is neat. The trimmed welded wire should extend 30 to 45 centimeters beyond the circumference line. Make trim patterns in squares. Do not leave sharp tails on the welded wire. Sharp wire can cause injury and blindness.
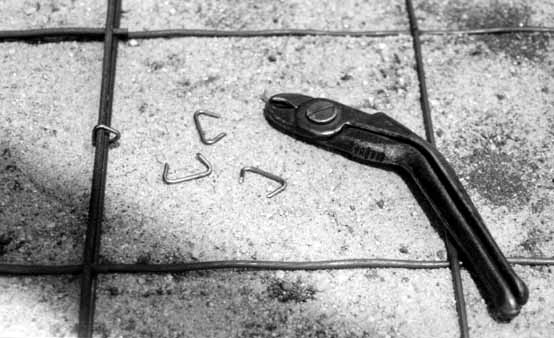
Hog ring pliers (above) and pneumatic hog ring gun are both are very helpful. They are purchased at wholesale upholstery supply stores. The regulator shown below can be used to deliver compressed air from a tank, purchase at welding supply store.


Note the absence of sharp wire tails when the welded wire is neatly cut in squares.
The wire extends less than 30 to 45 centimeters in the example because it is a small, 7.5 cubic meter tank (2000 gallons). Extend beyond the circumference more fully for tanks above fifteen cubic meters.
A decision about roof construction is made before the floor steel is placed. If the water tank is the only one which will be built, that is, if no roof supports which can be used more than once are also being built; it can be helpful to dig a hole in the center of the tank to receive a center pole of at least five centimeter pipe when the floor concrete is placed. Although a wooden post sitting on the concrete floor is adequate, a strong center pole securely mounted in concrete is convenient, especially as tank size increases; build a tempory center pole hoist economically.

The reinforcing bar grid only needs to be tied enough to keep it in place until the second layer of welded wire is tied on top. The second layer is unrolled at a right angle to the first layer and offset over the first layer to create 7.5 centimeter squares (3").
Alternatively, the second layer of wire can be placed on a forty-five degree angle. The object is to make smaller and smaller areas of concrete without steel reinforcement.
Fasten the the first and second layers of welded wire together with tie wire or hog rings. Work from the center outward. Leave the outer thirty centimeters or so untied until the reinforcing bar and the welded wire are bent to vertical at the circumference line.
Bend the top layer of welded wire to vertical by placing the side of one foot to the circumference line and about two centimeters inside it. Position so the curve to vertical results in the upper layer being bent upward just inside the circumference line. It can become difficult to force the horizontal squares into a vertical circle. Additional material may be cut from the welded wire where resistance develops. For example: remove fifteen centimeters from every meter of circumference, this leaves shorter pieces to bend into vertical position. The finished vertical wall bend for this first layer should extend upward a minimum of thirty centimeters.
Now bend the reinforcing steel to vertical being careful to keep the bends just inside the circumference line. This bend can be done with hands and feet or with a piece of pipe slid onto the bar steel to bend it upward. A standard bending tool is also good to use for this bend. If two vertical bars are closer than about fifteen cm, cut one off at fifteen cm above the floor steel.
Tie a horizontal #4 bar to the verticals about nine centimeters above the floor steel. This is the horizontal key steel and will be cemented into a wall key when the floor is plastered. After this first horizontal wall steel is in place, go around the tank floor and make the bend of the inner welded wire as neat and squarely bent as practical. Light hammer blows can assist this task in occasional places which are difficult. Finish the wire ties which were left undone around the outer thirty centimeters of floor to make bending the reinforcing steel easier.
Bend the remaining layer of welded wire upward and vertical. The lower layer of welded wire in the floor becomes the outer layer in the wall. When removing squares from the outer layer it is important to do it so no gaps go through the now vertical layers. If a gap is inadvertently created, patch it with small pieces from the scrap pile.
Inventory clean scraps by size for rapid retrieval of often perfectly cut pieces.

Tie or hog ring all remaining steel and lift the finished floor armature onto 3.75 cm thick support blocks made of concrete.
Note: All usable scraps should have sharp tails removed before being placed in scrap inventory. This will eliminate frustrating tangles and possible injury. Scraps too small for use should be put into a a recycling container after being cut into small harmless pieces. Some scraps can be made into very fine welding rod and stored for later use.

Note:
To make the floor 1.5 centimeters thinner: Support the steel armature with two centimeter support blocks. Add a fourth layer of poultry wire on top of the three layers shown.